An internal transfer is a process when funds are deposited or withdrawn from one Bitfinex account to another. To initiate an internal transfer between Bitfinex accounts, the user transferring funds must know the recipient's Bitfinex deposit address.
Important: For tokens that require a tag or a memo, please include the receiver's deposit tag/memo for the transaction to be properly allocated. You can read more here: How to use a memo/tag/Payment ID when making a deposit or withdrawal on Bitfinex.
Note: Internal transfers are free of charge and faster than on-chain transactions.
How to send funds internally on Bitfinex
1. Firstly, navigate to the Wallet section on the top panel dropdown menu and select Withdrawals.
2. Then, on your Withdrawal page, select Cryptocurrency or Tether tokens, according to the token you wish to transfer.
As an example, we will show how to transfer with BTC:
3. From the dropdown menu that appears, you will be able to select the token that you want to withdraw.
Note: Only tokens that you hold as an available balance on your Bitfinex account will appear on the list of available tokens to withdraw.
4. After selecting, you will be directed to enter the details of your transaction. Here enter the address of the Bitfinex account to which you are transferring funds. If you've entered the correct Bitfinex address, you'll notice that the Tx Fee is zero, indicating that this is an internal transaction with no fees.
Notes:
- The transaction is free only when the recipient address belongs to Bitfinex and the system will automatically detect if it belongs to Bitfinex by the fee change.
- Lightning Network transactions between internal accounts will still require a small fee that is paid to the nodes which process the transaction. For more information about Lightning Network transactions on Bitfinex, please see our guide Lightning Network BTC (LN-BTC) Deposits & Withdrawals.
- The minimum withdrawal amount on Bitfinex is $5 equivalent, which is necessary to avoid dust amounts from being processed.
As you see in the image below, the relevant fee will apply if it is not a Bitfinex address.
For details on fees charged for external transactions, please view our Fees page.
5. Once you have confirmed all the information and clicked Continue, you will need to go through the security confirmation steps. This includes Two-Factor Authentication via the 2FA code or U2F.
6. Next, you will need to check your email to confirm the withdrawal.
Note: If the confirmation email is not in your inbox, it is good practice to check your spam folder in case the confirmation email has been accidentally filtered.
Your withdrawal will show a User Emailed status indicating that the withdrawal is waiting for final confirmation. If you do not confirm, the withdrawal will be automatically cancelled after 12 hours.
Important: You can also click on the Re-send email button on the Withdrawal page to send the confirmation email again.
Note: For automatic withdrawals that do not require email confirmation, you can consider getting your account Greenlaned. We encourage all users to review our Greenlane Conditions, which significantly increase personal security, reduce the required number of confirmations for cryptocurrency deposits, and prioritize withdrawals through automatic processing.
7. You’re almost done! Once you click on the email link, you will be taken back to the Bitfinex withdrawal page for final confirmation. Before clicking the green Approve button, double-check the withdrawal token, amount, and address.
If you did not submit the withdrawal request and believe your account has been compromised, you should immediately Cancel the withdrawal, freeze your account, and contact Bitfinex Customer Support.
8. If you opted to approve the withdrawal, it would then be processed, and you will see it marked Completed on your Withdrawal page when the transaction is successfully processed.
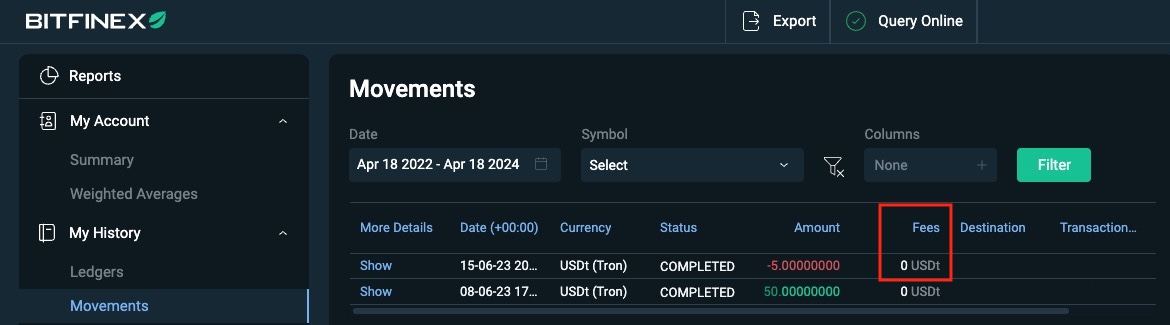
Note: Information regarding your withdrawal is available on your Reports > My History > Movements page.
You will notice that the Fees column is blank, indicating that no additional fees were charged for this internal transfer:
In addition to the Movement page, the Bitfinex user who is the recipient of your transaction will see this information on their Deposit page as well.
If you have any inquiries regarding your internal transfer, please contact Bitfinex Support. When contacting support, you should include important details such as the Deposit/Withdrawal ID, token name, and amount.